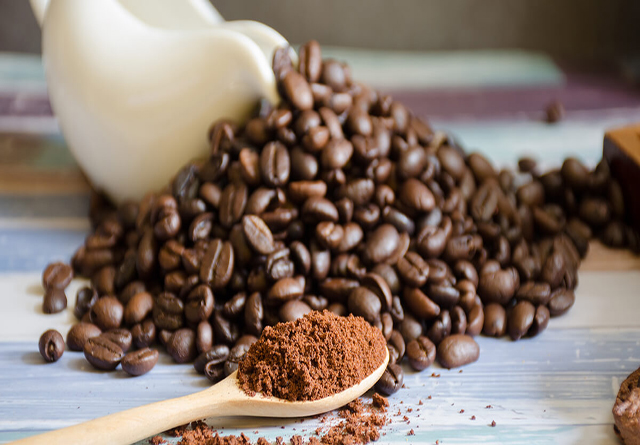
Coffee lovers appreciate good coffee. Grinding your coffee beans into a fine powder is a ritual that contributes to the taste of your mug. You can use a grinder to accomplish this task, but you may lack space for some high-powered appliances. If you’ve got some kitchen accouterments and a few minutes to spare, you can easily replicate the texture and consistency that commercial grinders provide without having to buy one.
Coffee lovers appreciate good coffee. Grinding your coffee beans into a fine powder is a ritual that contributes to the taste of your mug. You can use a grinder to accomplish this task, but you may lack space for some high-powered appliances.
If you have got some kitchen accouterments and a few minutes to spare, you can easily replicate the texture and consistency that commercial grinders provide without having to buy one.

So here are 8 ways to grind coffee beans without a grinder
1) Coffee Grinding With A Rolling Pin
a) Take a handful of beans and put them in the bowl of your rolling pin.
b) Roll the pin over the beans until the beans form an even layer of powder on a cutting board or countertop.
c) Continue rolling the beans until they’re finely ground.
d) Place the coffee grounds in a storage container or coffee mug and store them in a cool, dry place until you’re ready to brew. If you prefer to use pre-ground coffee, you can still use the rolling pin to grind your beans before brewing. Just store them in an airtight zip-top bag or another airtight container.
You may also like: What To Do With Expired Coffee Beans: 17 Great Ideas For Using Stale Coffee
2) Coffee Grinding With A Pestle And Mortar
a) Put some beans in the mortar or pestle bowl and, using the pestle and hammer, crush the beans until they’re evenly ground, using the pestle to grind smaller pieces into the mortar. Place the ground beans in a storage container or coffee mug and store them in a cool, dry place until you’re ready to brew.
b) To grind larger amounts of beans before brewing, you can transfer the ground beans into a plastic storage bag with a seal. It might seem wasteful to throw all those ground beans into a bag just to throw them away again, but using the sealing feature will ensure that there’s no ground bean leakage.
c) A metal or stone pestle and mortar will yield more finely ground coffee than a wooden bowl or wooden pestle. You want to choose a sturdy version that isn’t going to break easily and that won’t transfer heat to the beans as you crush them.
3) Coffee Grinding With An Electric Hand Mixer
a) Put a handful of coffee beans in the bowl of the mixer and, using the beaters, turn the power on and slowly turn the mixer in a circular motion over the bowl until the entire surface is evenly coated in a fine layer of ground beans. Continue until the beans are fully ground and place them in an airtight container until you’re ready to brew.
b) Grind larger amounts of beans before brewing by pouring them into a coffee filter that’s placed inside a funnel or funnel-like container. Or, if you prefer to store your ground beans in a plastic bag with a seal, then grind the beans in small batches and store them until you’re ready to brew. Both methods will preserve freshness for better flavor.
c) Using a hand mixer will yield more finely ground coffee than using a wooden spoon or spatula. You want to choose a sturdy version that isn’t going to break easily and that won’t transfer heat to the beans as you mix them.
4) Coffee Grinding With An Electric Whisk
a) Put a handful of coffee beans in the bowl of the mixer and, using the whisk, turn the mixer on and slowly turn the mixer in a circular motion over the bowl until the entire surface is evenly coated in a fine layer of ground beans. Continue until the beans are fully ground and place them in an airtight container until you’re ready to brew.
b) For grinding larger amounts of beans before brewing, an alternative method could be to whisk the ground beans in a strainer or coffee filter that’s placed inside a funnel or funnel-like container.
c) Using a whisk will yield more finely ground coffee than using a wooden spoon or spatula. You want to choose a sturdy version that isn’t going to break easily and that won’t transfer heat to the beans as you whisk them.
5) Coffee Grinding With An Electric Spice Grinder
a) Put the coffee beans in the spice grinder and turn it on to grind the beans into a fine powder. Continue turning the grinder until the beans are fully ground and place them in an airtight container until you’re ready to brew.
b) You can even add a small amount of oil into the spice grinder with the beans to help them release their flavor and aroma while you grind them.
6) Coffee Grinding With An Electric Mixer
a) Put a handful of coffee beans in the bowl of the mixer and, using the beaters, turn the power on and slowly turn the mixer in a circular motion over the bowl until the entire surface is evenly coated in a fine layer of ground beans. Continue until the beans are fully ground and place them in an airtight container until you’re ready to brew.
b) Disposable plastic containers with a seal are a convenient way to grind coffee before brewing. Ground coffee has a tendency to leak through containers without a seal and this can result in a mess in your cupboards and drawers. By storing ground coffee in sealed containers, you’ll avoid the mess in your household.
7) Coffee Grinding With A Food Processor
a) Put a handful of coffee beans in a food processor bowl and process until finely ground. Once you have reached your desired texture, fill the food processor with beans only and pulse quickly until the beans reach your desired level of fineness. Store them in an airtight container until you’re ready to brew.
b) You can store the ground coffee beans in a sealed container in your refrigerator to keep them fresh for 2 weeks or in the freezer for up to 2 months. Just toss them into the coffeemaker and grind them just before brewing.
8) Coffee Grinding With A Blender
a) Put a handful of coffee beans in the blender pitcher and, using the blender, turn the blender on and slowly turn the blender in a circular motion over the pitcher until the entire surface is evenly coated in a fine layer of ground beans. Continue until the beans are fully ground and place them in an airtight container until you’re ready to brew.
b) In order to grind more beans before brewing, you can transfer the grounded beans into a plastic storage bag with a seal. Additionally, you can add a pinch of cinnamon into the mix before blending to add flavor to the coffee.
On the whole, grinding coffee beans with a blender or food processor is a quick and convenient method to grind more beans before brewing. Just toss them into the coffeemaker and grind them just before brewing. Whether they’re fresh or a bit stale, you will get the same great taste from freshly ground beans.